why make this recipe
Jack Skellington Oreo Pops are a fun and festive treat, perfect for Halloween or any celebration. They are easy to make and can be a great activity for kids and adults alike. With just a few ingredients, you can create delightful pops that are not only tasty but also visually appealing. Plus, who wouldn’t want to enjoy a sweet treat inspired by the Pumpkin King himself?
how to make Jack Skellington Oreo Pops
Ingredients:
- Oreo Cookies (1 package, 14.3 oz / 405g): I strongly recommend using Double Stuf Oreos. The extra layer of cream filling provides a much more secure “grip” for the lollipop stick, significantly reducing the chances of the cookie breaking or splitting when you insert the stick. The classic flavor is perfect, but feel free to experiment with Golden Oreos for a different taste.
- Bright White Chocolate Melting Wafers (2 bags, 12 oz / 340g each): This is the most crucial ingredient for getting that perfect Jack Skellington look. Do not substitute with white chocolate chips! White chocolate chips contain stabilizers that prevent them from melting into a smooth, thin consistency needed for dipping. They can become thick, clumpy, and have a yellowish tint. Melting wafers (like Ghirardelli or Wilton Candy Melts) are specifically designed for this purpose. They melt to a fluid, velvety texture and set with a firm, satisfying snap. Using “Bright White” wafers ensures you get a true, bone-white color worthy of the Pumpkin King.
- Lollipop Sticks (Approx. 24 sticks, 6-inch size): The 6-inch sticks are the ideal length. They provide enough room to hold onto the pop comfortably without being overly long or awkward. You can find these in the baking aisle of most craft stores or supermarkets.
- Black Food Writer Edible Marker OR Black Decorating Icing: You have two excellent options here, depending on your preference and skill level.
- Black Food Writer Edible Marker (1): This is the easiest and cleanest method, especially for kids. It’s like drawing on the cookie with a regular marker. It gives you great control for creating the fine lines of the eyes and the stitched mouth. Look for one with a fine tip for the best detail.
- Black Decorating Icing in a Tube with a Fine Tip (1 tube): This method provides a slightly more three-dimensional, raised look to the features, which can be very appealing. It requires a steadier hand but offers a bold, professional finish. The pre-packaged tubes with a small round tip (like Wilton’s #2 or #3 tip) are perfect for this task.
Directions:
- Line two large baking sheets with parchment or wax paper. This is where your finished pops will rest and set.
- (Optional but recommended) Gently twist open each Double Stuf Oreo. You want one side to have all the cream filling. If some cookies break, don’t worry—they make for a great snack! Set the halves aside in pairs.
- Place about 1/4 cup of the white chocolate melting wafers into a small, microwave-safe dish. Heat in the microwave for 30 seconds, then stir. If not fully melted, continue heating in 15-second intervals, stirring each time until smooth. This small amount of melted chocolate will act as our “glue.”
- Dip the tip of a lollipop stick (about 1/2 inch) into the melted chocolate and press it into the center of the cream filling on one of the Oreo halves.
- Place the other cookie half back on top and press down gently to sandwich the stick firmly in place. The melted chocolate will harden and anchor the stick securely inside the Oreo.
- Place the assembled Oreo pops on one of the prepared baking sheets and put them in the freezer for at least 15 minutes.
- While the pops are chilling, pour the remaining melting wafers into a deep microwave-safe bowl. Heat in the microwave for 30 seconds at 50% power. Stir thoroughly and continue to microwave in 30-second intervals at 50% power, stirring well after each one until smooth.
- If it seems too thick, stir in 1 teaspoon of vegetable shortening or coconut oil to help thin it out.
- Remove the Oreo pops from the freezer. Hold one pop by the stick and fully submerge it into the melted white chocolate. Ensure the entire cookie is coated.
- Gently tap the hand holding the stick against the wrist of your other hand to encourage the excess chocolate to drip off smoothly. Rotate the pop slowly as it drips to ensure an even coating.
- Lay the coated pop down on the parchment-lined baking sheet. Once all pops are dipped, refrigerate for at least 30 minutes or until firm.
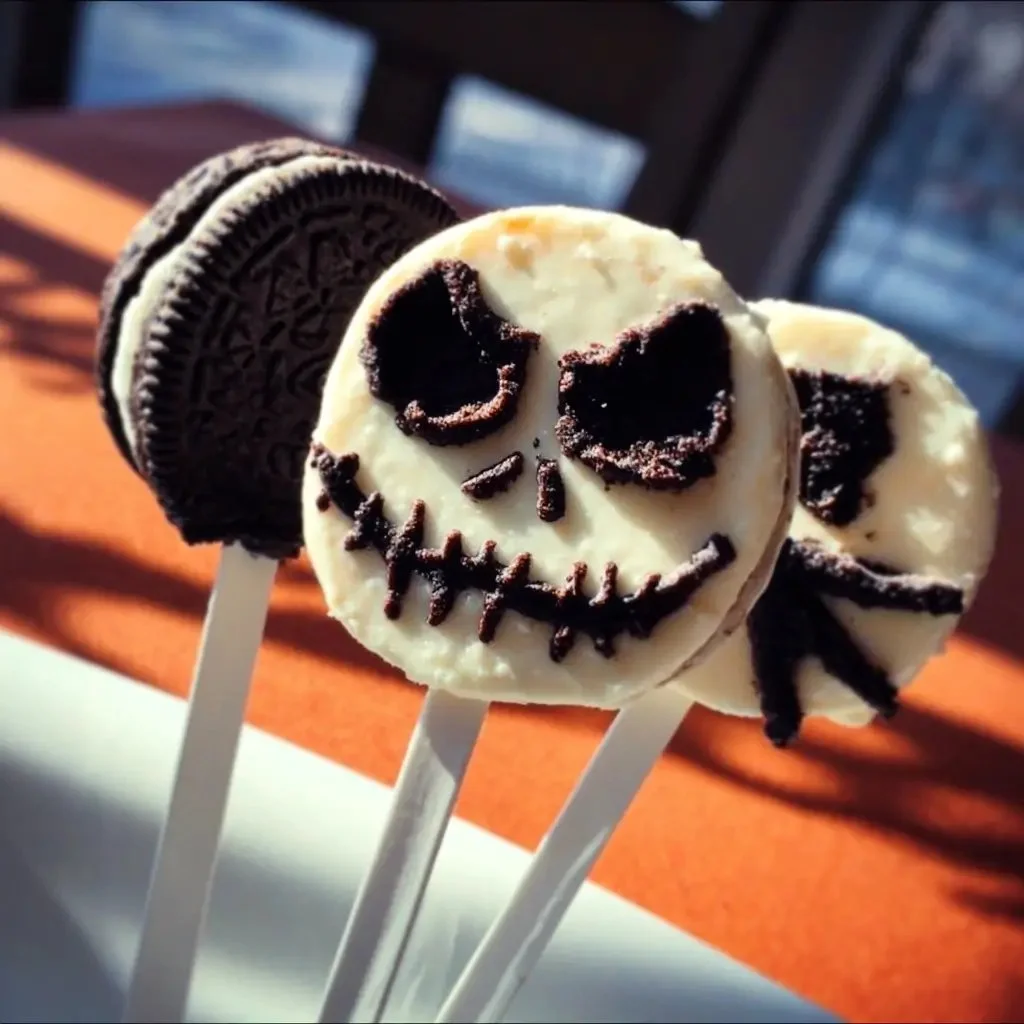
- Decorate Jack’s face by drawing two large, oblong black eyes, two small nostril slits, and a wide, stitched mouth. Use the edible marker or decorating icing as desired.
- If using icing, allow the decoration to set for about an hour before serving or storing.
how to serve Jack Skellington Oreo Pops
Serve these fun pops on a festive platter or stick them in a block of foam for a spooky display. They can be great for kids’ parties, Halloween celebrations, or just as a special treat for fans of "The Nightmare Before Christmas."
how to store Jack Skellington Oreo Pops
Store your Oreo pops in an airtight container at room temperature for up to a week. If it’s warm, keep them in the refrigerator to prevent the chocolate from melting.
tips to make Jack Skellington Oreo Pops
- Use a steady hand for decorating to get clear and neat designs.
- If you’re having trouble with the chocolate coating, let it cool slightly before dipping again.
- Add edible glitter or sprinkles for extra festive flair!
variation
You can customize Jack Skellington Oreo Pops by using different colored melting wafers for various characters or themes, or by choosing other flavored Oreos for a unique taste twist.
FAQs
1. Can I use regular chocolate instead of white chocolate?
Yes, but Jack’s look is best achieved with white chocolate for that spooky appearance.
2. How can I make these pops vegan?
Use vegan Oreos and select dairy-free melting chocolate options available in stores.
3. Can kids help with this recipe?
Definitely! Kids can help with assembling the pops and decorating them with supervision. It’s a fun and safe cooking project for all ages.