why make this recipe
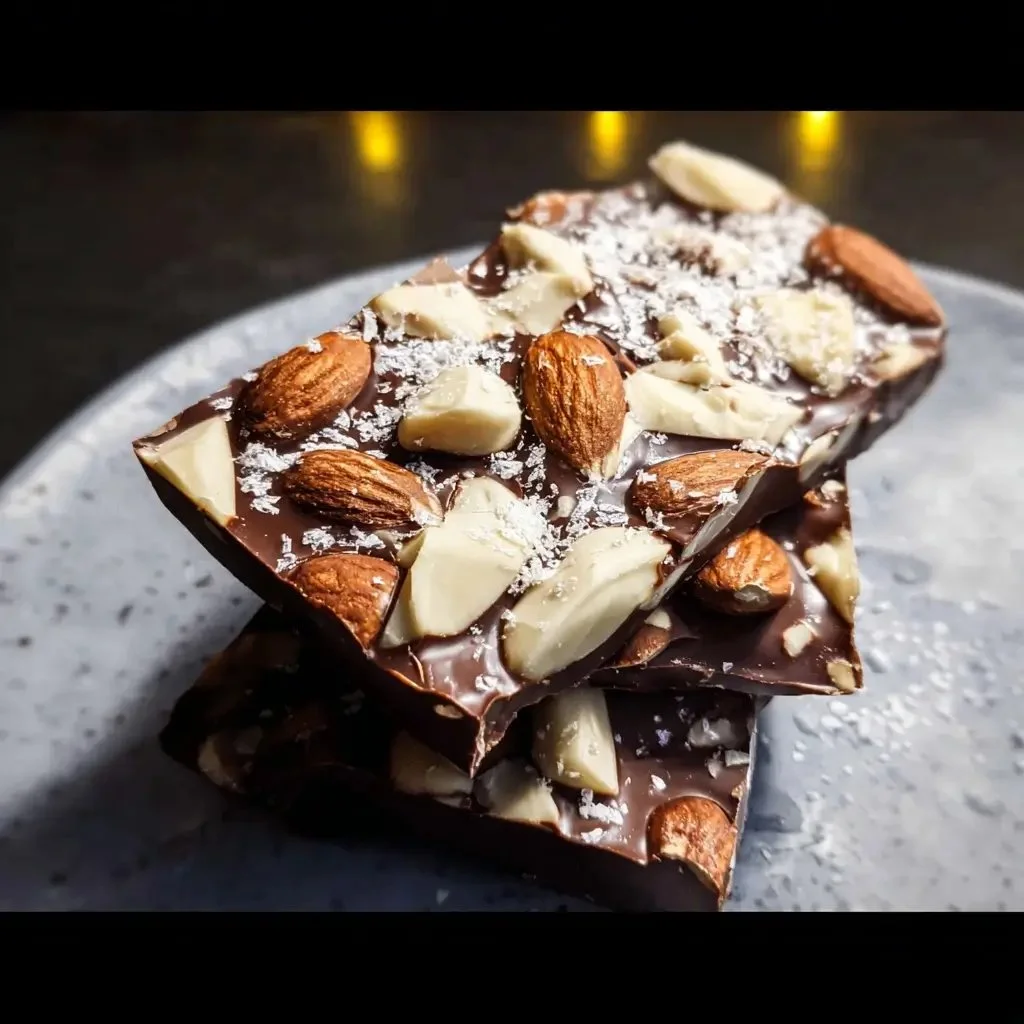
Homemade almond bark is a delightful treat that’s easy to make and perfect for sharing. This recipe combines crunchy, toasted almonds with smooth, melted chocolate for a satisfying snack or dessert. It’s a simple process that lets you enjoy a sweet indulgence in your own kitchen. You can customize it with different types of chocolate, and it’s great for gift-giving or special occasions.
how to make Homemade Almond Bark
Ingredients:
- High-Quality Chocolate or Candy Melts: 24 ounces (about 4 cups of chips or wafers). You can use white chocolate, milk chocolate, semi-sweet chocolate, or dark chocolate. For beginners, high-quality candy melts (like Ghirardelli or Wilton) are foolproof as they are designed to melt smoothly without tempering.
- Whole Raw Almonds: 2 cups. Toasting them is a non-negotiable step for the best flavor and texture.
- Flaky Sea Salt: 1 teaspoon, for finishing. Maldon or another flaky variety is highly recommended over table salt.
Directions:
- Take a large, rimmed baking sheet (approximately 13×18 inches) and line it completely with parchment paper or a silicone baking mat. This is crucial for preventing the bark from sticking and making cleanup a breeze.
- Have your chocolate, almonds, and salt measured out and ready to go.
- Spread the raw almonds in a single, even layer on a dry baking sheet (you can use the one you’ll make the bark on, just be sure to let it cool before pouring chocolate on it).
- Bake for 7-10 minutes, shaking the pan or stirring the almonds halfway through. Keep a very close eye on them, as nuts can go from perfectly toasted to burnt in less than a minute. They are ready when they are fragrant and have turned a slightly deeper golden brown.
- Remove from the oven and let them cool completely. You can roughly chop about half of them if you prefer a mix of whole and chopped almonds for textural variety.
- Place the top of a double boiler or a heatproof bowl (glass or metal) over a saucepan filled with simmering water. Ensure the bottom of the bowl does not touch the water.
- Add about two-thirds of your chocolate to the bowl. Stir constantly with a silicone spatula as it melts. The gentle, indirect heat will prevent scorching.
- Once the chocolate is almost completely melted, with just a few small lumps remaining, remove the bowl from the heat. The residual heat will melt the rest.
- Add the remaining one-third of the chocolate and stir until everything is completely smooth and glossy. This technique helps temper the chocolate slightly, giving it a better shine and snap.
- If using a microwave, heat the chocolate on 50% power for 1-minute intervals. After each interval, remove the bowl and stir thoroughly. The chips or wafers hold their shape, so stirring is key to distributing the heat.
- Continue this process until the chocolate is about 90% melted. Then, simply stir until the residual heat melts the remaining bits into a smooth, fluid consistency. Be very careful not to overheat it.
- Once your chocolate is perfectly melted and smooth, add the cooled, toasted almonds. Fold them in until they are all evenly and generously coated in the chocolate.
- Immediately pour the chocolate-almond mixture onto your prepared baking sheet.
- Use an offset spatula or the back of a spoon to spread the mixture into a thin, even layer, about ¼-inch thick. Don’t worry about making the edges perfect; the rustic look is part of the charm.
- While the chocolate is still wet, sprinkle the flaky sea salt evenly over the entire surface.
- Allow the bark to cool and harden completely at room temperature. This can take 2-4 hours, depending on the temperature and humidity of your kitchen. Letting it set at room temperature results in a shinier finish and a better “snap.”
- If you’re in a hurry, you can place the baking sheet in the refrigerator for about 30-45 minutes, or until firm. Be aware that this can sometimes cause the surface of the chocolate to “bloom” (develop faint white streaks), which is a cosmetic issue and doesn’t affect the taste.
- Once the bark is completely hard, lift the parchment paper from the baking sheet. You can now break the bark into irregular, rustic pieces with your hands. For cleaner edges, you can place it on a cutting board and use a large knife to chop it into shards.
- The almond bark is now ready to be served and enjoyed!
how to serve Homemade Almond Bark
Serve your homemade almond bark as a tasty snack or dessert. It makes a wonderful treat to enjoy after meals, during holidays, or at parties. You can also package it in clear bags tied with ribbon for a delightful homemade gift.
how to store Homemade Almond Bark
Store the almond bark in an airtight container in a cool, dry place. It will stay fresh for about 2-3 weeks, although it’s likely to be eaten long before then! If you want to extend its lifespan, you can also refrigerate it, but allow it to come to room temperature before serving.
tips to make Homemade Almond Bark
- Use Good Quality Ingredients: The type of chocolate you use matters. High-quality chocolate will taste better.
- Monitor the Nuts: When toasting the almonds, watch them closely. They can burn quickly.
- Be Patient: Allow the chocolate to cool and harden at room temperature for the best texture and shine.
- Experiment: Feel free to add dried fruits, other nuts, or different types of chocolate to create your own variations.
variation
You can customize your almond bark by adding other ingredients. Consider mixing in dried cranberries, raisins, or even a drizzle of caramel on top for a fun twist!
FAQs
1. Can I use other types of nuts?
Yes! You can substitute almonds with walnuts, pecans, or peanuts.
2. What if I don’t have a double boiler?
You can microwave the chocolate in short intervals, stirring in between, to melt it smoothly.
3. How do I know when the chocolate is melted?
The chocolate should be smooth and glossy without any lumps. Stir continuously to ensure even melting.